FREE SHIPPING ON ORDERS $35+ (Excludes Bulky Items)
Lock Installation Kit
LOCK INSTALLATION KIT FAQ's
What is a Lock Installation Kit?
A lock installation kit is a set of tools and accessories that help you install a door lock or a deadbolt on your door. A lock installation kit can make the process of installing a door lock or a deadbolt easier, faster, and more accurate. It can also save you money by eliminating the need for hiring a professional locksmith. However, a lock installation kit may not be compatible with all types of doors, locks, or deadbolts, so you need to check the specifications and instructions before buying or using one.
What is Lock Installation Kit composed of?
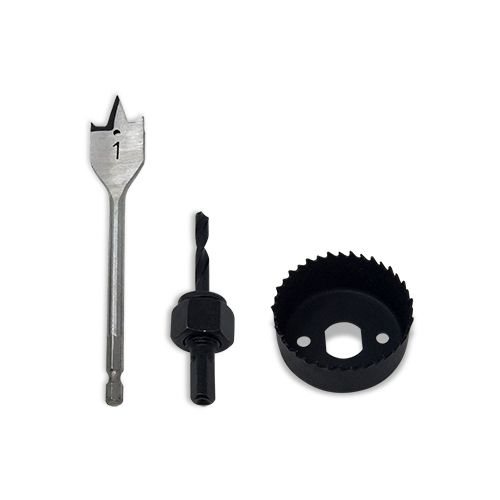
A lock installation kit usually includes:
- A jig or a template: This is a tool that helps you align and mark the position of the holes for the lock and the latch on the door and the door frame. It has measurements and adjustments for different backsets and door thicknesses.
- A hole saw or a drill bit: This is a tool that helps you cut or drill the holes for the lock and the latch on the door and the door frame. It has different sizes and types for different materials and hole diameters.
- A chisel or a router bit: This is a tool that helps you carve out the mortise for the latch plate on the door frame. It has different sizes and shapes for different latch plates and mortises.
- A screwdriver or a drill driver: This is a tool that helps you fasten the screws for the lock and the latch on the door and the door frame. It has different sizes and types for different screws and drivers.
How to use a Lock Installation Kit?
To use a lock installation kit, you need to follow some steps, such as1234:
- Choose the right lock and the right lock installation kit for your door. There are different types of locks and lock installation kits, such as knob locks, lever locks, deadbolts, and smart locks. You need to check the specifications and instructions of the lock and the kit before buying or using them.
- Position the jig or the template on the door and the door frame. The jig or the template is a tool that helps you align and mark the position of the holes for the lock and the latch on the door and the door frame. You need to use a ruler or a level to ensure that the jig or the template is centered and leveled on both sides of the door. You also need to adjust the jig or the template according to the backset and the thickness of your door.
- Cut or drill the holes for the lock and the latch on the door and the door frame. The hole saw or a drill bit is a tool that helps you cut or drill the holes for the lock and the latch on the door and the door frame. You need to attach the hole saw or the drill bit to a power drill and use it to cut or drill through both sides of the door and one side of the door frame. You need to be careful not to damage or splinter the wood as you cut or drill.
- Carve out the mortise for the latch plate on the door frame. The chisel or the router bit is a tool that helps you carve out the mortise for the latch plate on the door frame. The mortise is a recessed area that allows the latch plate to fit flush with the surface of the door frame. You need to use a chisel or a router bit to remove some wood from inside the hole that you drilled on the door frame until you create a mortise that matches the size and shape of your latch plate.
- Fasten the screws for the lock and the latch on the door and the door frame. The screwdriver or the drill driver is a tool that helps you fasten the screws for the lock and the latch on the door and the door frame. You need to insert and tighten each screw into its corresponding hole until you secure all parts of your lock and the latch on your door and your door frame.